Select an eCommerce platform
This is the primary requirement for an eCommerce business. Yes, you can set up a site by yourself or with a developer; but it won’t be easy or cheap. We recommend Shopify because it's the safest and most trustworthy platform to sell online. Other platforms don’t even come close. Shopify comes complete with a library of great themes to get you started with, you can then tweak them to your heart’s desire. Making building your own online atore, almost child's play.
You can also get in touch with me at scott@creatibly.com to create your Shopify store for free. You can take as long as you want to tweak your store, without worrying about the trial. You only pay when you are ready to go live!
At Creatibly, we also offer a whole range of services to setup, run and scale your eCommerce store with confidence. Our services include:
- Shopify eCommerce Design and Development
- Shopify Search Engine Optimazation (SEO) Services
- eCommerce Content Writing Service
- App and Integration Services
- Ongoing eCommerce Maintainence Services
- Theme Development Services
- Shopify Migration Services
- Shopify eCommerce Training and Consulting Services
Know your demographic
The next step is to know your demographic. Who is your audience? Where are they located? What other products do they buy? These are all important questions. Take some time building out your customer profiles including age, gender, occupation, and income.
If you have a product already, defining the target audience will be easy. Build 2-3 buyer personas and give them names as well. Adding this to the business plan will enable easy recall when thinking about marketing campaigns in the future.
If you don’t have a product yet, you may want to narrow down a few product categories, and then work bottom down. Who do you want your customers to be, followed by what would they buy? As a business owner and more importantly and online store owner, you should have a solid idea of who your customers are.
Selecting the right products
One of the biggest challenges is to select the right product, even if you have the right product, knowing the best approach for it can be tricky. If you already have a target demographic in mind, this can become easier.
For the best results, it's always advisable to appeal to a niche within a market. This can be trends within the market or something that hobbyists would like. For example: Selling seeds online can be great, but a starter gardening kit will reel in some hobbyists interested in a niche. Seek this unique angle for your line of products.
Putting your personal story and passion behind the product helps as well. Instead of buying your product, online shoppers will be buying into your story. The product will go from meeting a need to being representative of a story.
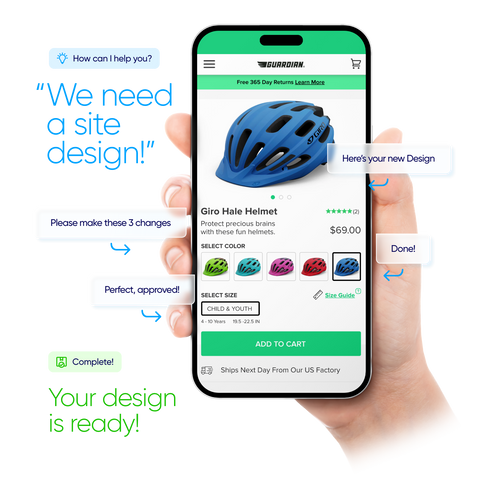
Designing your Shopify site
Before you get started, you setup a Shopify account, and choose to start a free trial with Shopify. Alternatively, you can send me an email at scott@creatibly.com and I will set up your new Shopify store for free and you can take as long as you want to make changes to it. Just email with your name and the store name you want to create, and we can take it from there!
Designing your site will be the longest step of the process. This will include adding products to your store and adding shopping pages to your website. All of which can be done from your Shopify dashboard.
To get started, you would need the following:
-
A business idea
-
A business name
-
A brand logo
-
Photography (Custom, Self or Stock)
Adding products
This is the primary step to creating your online store. After all, it makes the very foundation of what you’re about. This step also requires great focus and attention to detail. Adding these products means adding images, writing product descriptions, and setting prices. This is where you convert customers; so ensure that you scrutinize each detail.
Start by adding product names and descriptions
Add a product title that makes it clear what the product is. Keep them short, these are what people will use to scan your store. They will see the image and will want to know what the product is. Standardize product names and use the same ones every time. If the size comes after the name, stay consistent with that across products. Save the details for product descriptions and variants. Make the titles as short as possible.
Next is product descriptions. Some of the things to consider when writing product descriptions are understanding your audience and who you are speaking to. Based on the demographic you chose earlier, you will have to alter your descriptions to appeal to them. These will be unique to your own store and you shouldn't copy and paste them for anywhere.
You should also highlight incentives to buy the product and anticipate any common questions toward the same. Address these questions right away, to help them make a safe and informed buying decision.
Make the text easy to scan by using bold text wherever necessary. Break paragraphs to separate points and use bullets. The objective is to sell people on the product quickly, your product descriptions should help do exactly that.
Lastly, help customers understand the product and see themselves using the product. A sizing chart in conjunction with sizing pictures will allow them to see the product on them or in their environment.
Add product images and any other media
On the product page, there will be a media section where you can add product photos. You can add photos, videos, GIFs, and 3D models as well. The presentation will make all the difference, so make sure you upload high-quality, clear images. You can click the pictures yourself till you can get professional shots. There are plenty of free apps and software that can help remove backgrounds, add colors, etc.
Use the same aspect ratio which means the images for products look the same size within the frame that they are in. If you are doing this by yourself, I recommend that you use Canva to add and resize images first, then upload them to the site. Based on the product you are selling, you may require multiple images from multiple angles.
Setting pricing
It's time to price the products. This is the amount customers will pay for the product. You can also add the comparison at price. Let's say you are selling a 6-pack of socks, you can add the comparison price for 6 socks and in comparison the price if someone buys the 6-pack.
When pricing your products you will have to factor in shipping costs, cost of raw materials, taxes, and any other overheads like employees and marketing costs. This would also include the cost of the time you invest working on your business and lastly the perceived value of your product.
If you have a solid business plan, you will have answers to the above pricing requirements. We will cover the pricing strategy for Shopify stores in a separate post.
Inventory
If we are dropshipping or using a print-on-demand service, we won’t need to configure inventory. For products you are storing yourself in your home or at a warehouse, you would need to have inventory set up. This tells how much of something you have and when you may need more.
You will need to add SKUs, Barcodes, and Quantity for each item. SKU names should be short and simple. Taking the gardening set example, a pot can have the SKU as POT-BRS for a small brown pot. You should be able to tell at a glance what the product is. You can choose to check continue selling if inventory is low or not. A product that takes a long time to procure, will be checked off.
Shipping
The shipping, section adds the weight for a physical product and the costume options in case you are shipping internationally. You would also need to add a harmonized system code which is different on the type of product you are selling.
Options
If your product comes in multiple colors or sizes, you can use this section to add variants instead of having multiple pages for multiple products. Once you add your options, when you click save, Shopify will ask you to refresh Media, Pricing, inventory, and Shipping for each of the variants.
Organization
You can label your products to create groups and make it easier to manage the entire store’s catalog as well. You can curate products for customers and apply discounts to specific products. You can use the following labels for your products:
-
Product availability
-
Product Type
-
Vendor
-
Tags
-
Collections
These tags stand for exactly what they sound like. Product availability helps you define the sales channels you want your products to be available on. Product Type can set product types for different types of items like T-Shirt, Pants, Hoodies, etc. The vendor label helps manage different vendors that you may be sourcing products from, tags help you associate a keyword with a product and collections help further categorization of products like articles for men, women, and children.
Learn how Creatibly can make Shopify design simple?
Search engine listing preview
Search engine listing preview helps customize how the listing would look in a search engine. Knowing the right keywords can help you target the consumer, by matching the listing words to their organic query.
This helps in SEO (Search Engine Optimization) of your Shopify store, which he has covered in-depth here.
Creating key Shopify pages
You can create most of your key pages under Online Store>Pages. Key pages are the pages that accompany the product pages which help people understand your brand, help them trust it, and inform them of any additional details about the same.
Some helpful pages that you need to launch your online store are:
-
About page
-
Contact page
-
Frequently Asked Questions
-
Policy pages
About page
The about page is where you tell your brand story. An insight into why you exist and what your product does or represents. You can edit this page to your heart’s content. For small businesses, it's a great opportunity to showcase why something they make matters.
Your art of storytelling will be the major differentiator here. The more convincing the story, the better the chance of someone making a purchase.
Within the dashboard, you will see formatting options for your text and edit it to emphasize specific touchpoints. This will require some experimentation but you will have a solid layout in no time!
Contact page
The contact page is to get in touch with your business or ask specific questions that they can’t find in the FAQs. Shopify allows you to create a contact page quite easily. Just got to the template section and select the contact template.
You can add contact information and also add links to other pages on the site like the FAQ section if required. You can also configure live-chat apps for one-on-one direct customer support.
Policy pages
Under Settings>Legal you can generate templates for policy pages that you can configure as per your local law. On the surface level, the policy page should include a return policy, a privacy policy, terms of service, and a shipping policy.
This is not legal advice, and you should consider your local law before you add something to your Shopify store.
Customize your online store
It's time to start designing the pages, by going to Online Store>Themes. This is where you can customize what your website will look like.
Start by choosing a theme
Choose from a free or premium theme for your Shopify store based on what you want your store to look like. There are themes based on the type and number of products you want to sell.
Don’t pick a theme based on colors or fonts. You can always alter them in every theme that you pick. Keep in mind the features that you need for the theme like the product categories, or a search bar. You can always try a premium theme from the Shopify theme store for free, before purchasing it. You are also not locked into the theme you choose, and you can change it later.
Design the homepage
Based on the amount of text and information that you want to share with your audience, you can create a plan for your homepage. Web designers call these wireframes, you too can try out a sketch on paper to make a wireframe of your homepage.
Only have essential sections on your homepage in a way that you educate any new customers about your product and convince them to buy. It is more complex than it sounds, and getting the copy right will take a considerable amount of thought and time.
Customize navigation menus
The header section is where you will make changes to your navigation menu. This is what people on your site will use to navigate through the site. You can set up 3 types of navigation you can setup including Main Navigation, Footer Navigation, and Search.
Keep navigation items to a minimum, you don’t want to overwhelm your customer with too many options. See what makes the overall user experience better and decide what would make for a good navigation element.
Set your colors and typography
Based on the brand that you are creating, you will have to choose colors and typography for the theme that you’ve chosen. If you don't have brand guidelines in your place, you can use a tool like coolors to create palettes and experiment with different colors.
For typography, use a sans-serif font like Montserrat for easy readability for the text. You can use more ornate fonts for headings and subheadings.
Customize checkout
Under theme settings, you can also customize how your checkout page looks. In the beginning, a simple logo should do the trick. You can also go to Settings>Checkout to define rules for how customers can checkout.
At this stage, you can also invite feedback from others toward your online store and how you can better their experience. The store is by default password protected, you can share this password with friends and close associates.
Setting up shipping
One of the most complex considerations for your online store can be setting up shipping. There are multiple variables like shipping costs, shipping destinations, carrier rates, and profit on each product.
Shipping in Shopify is convenient and easy to set up. You can also use Shopify shipping to save on costs. You can offer free shipping on higher purchase values to incentivize customers to buy more! Shopify shipping also enables your customers to calculate shipping costs right at checkout and print shipping labels for you as soon as you receive an order. Setup and forget it!
We will cover the specifics of setting shipping in a different post.
Set up taxes
You can configure taxes under Settings>Taxes. You would likely have to work with an accountant to set up the rates based on your region. You can also view how much tax you’ve collected under Analytics>Reports.
Maxing out Shopify
Shopify is a powerful platform no doubt. The steps to this point should help you start selling online. Shopify has many other features like the Shopify App Store and Shop Pay which you can use to automate your business and make customer experience more seamless.
As your business grows you can explore these yourselves. You can also work with a Shopify Expert like the ones at Creatibly to help you make the right choices for your online business.
Add a payment gateway
You can configure payments by going to Settings>Payments. With Shopify Payments, you can easily accept all major forms of payment. You can also choose from other payment providers like Paypal or Stripe.
You will then need to add the payment options that you want to add, the number of currencies, and your payout schedule for the money received. You should also add fraud prevention methods like CVV and ZIP codes. If selling internationally, ZIP codes are not advisable since foreign banks do not offer such protection to their users.
You can also customize how your name appears on your customer’s bank statement.
Get ready to launch
First, we would remove the password protection from the store. Before you start marketing efforts and driving traffic to your own online store, you have a few small considerations to make. Although you are all set to start selling, I would advise that you have the following in place.
-
A custom domain name
-
Add sales channels
-
Set your store for marketing
Under Settings>Domains you can buy a domain directly from Shopify or transfer one that you already own from a registrar like Hostinger or GoDaddy.
You can then add sales channels like a physical store, social media platforms, and other online marketplaces like amazon. You can also add a google shopping channel or get a buy button added to your own website.
Launch, launch, launch
Your new online store is ready for launch. Is your store perfect? Probably not, and that’s alright. Websites and online stores are always a work in progress. But you are all set to start selling on Shopify. Now it is time to drive traffic to your store, attract customers and optimize your store for a better experience.
To generate traffic, we have covered various methods to attract and convert customers to this site. You can find articles for the same in the list below.
- How do I earn a full-time income with my Shopify site?
- How can I get a free Shopify Site in 2023?
- How do I make a successful Shopify store?
How do I get started with my Shopify eCommerce website?